

LH Test Strips How to Use a Practical Step-by-Step Guide
Dr. Adeyinka AdegbosinYou're standing at the kitchen bench with a small LH strip between your fingers, a urine cup beside you, and one nagging question: Did I just use this correctly? The control line is visible, the second line is pale, and your phone is ready to photograph the result before it changes.
Learning LH test strips how to use is less about guessing the shade of a line and more about building a repeatable routine. The important details are practical ones: when to begin testing, how concentrated the urine should be, how far to dip the strip, when to read it, and how to record what you see. This guide walks through the process from opening the pouch to interpreting results with an app.
Starting With Your First Strip in Hand
Start with the ordinary things on the bench. There's usually a sealed foil pouch, a small desiccant packet, and the narrow absorbent strip. The desiccant helps protect the unopened test from moisture. It isn't part of the test, so leave it in the rubbish once you've opened the pouch.
Most kits contain a supply of strips for testing across several days, rather than one test only. That matters because the useful information comes from the pattern of your results, not from one isolated strip.
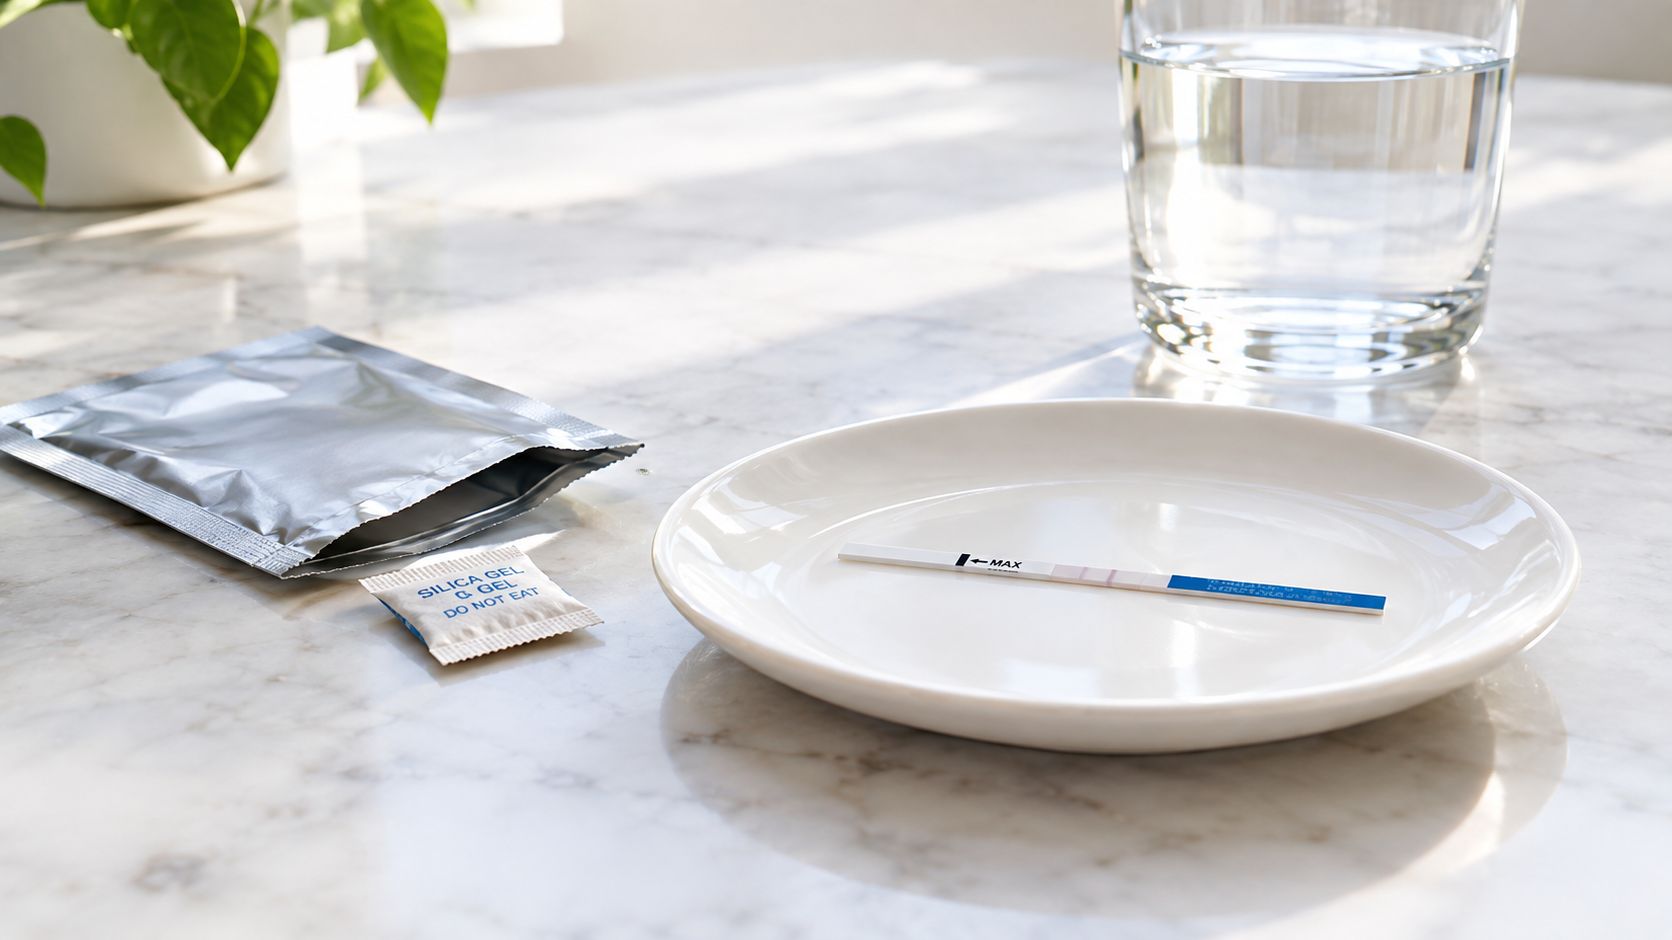
Before opening the pouch, take a calm 30-second pre-test check:
- Check the expiry date: An expired strip may not perform as intended.
- Inspect the foil: Use it only if the pouch is fully sealed and undamaged.
- Wash and dry your hands: This keeps the strip and sample routine clean.
- Find a clean, dry cup: A small plastic or glass cup is easier to control than testing under a urine stream.
- Clear a flat surface: The strip needs to lie level while it develops.
- Set up your phone or timer: You'll need to record the result inside the kit's reading window.
If you're still unsure about what each part does, a simple guide to ovulation strip tests can help you recognise the physical format before you begin.
The strip has a handle end and an absorbent end. Don't touch the absorbent area with wet fingers, and don't dip beyond the printed MAX line. Once the sample reaches the strip, place it flat and follow the timing on the leaflet. The rest of this guide covers the timing, sample collection, line comparison, common mistakes, and app logging, so you won't have to solve each decision at the bench alone.
How LH Strips Actually Work
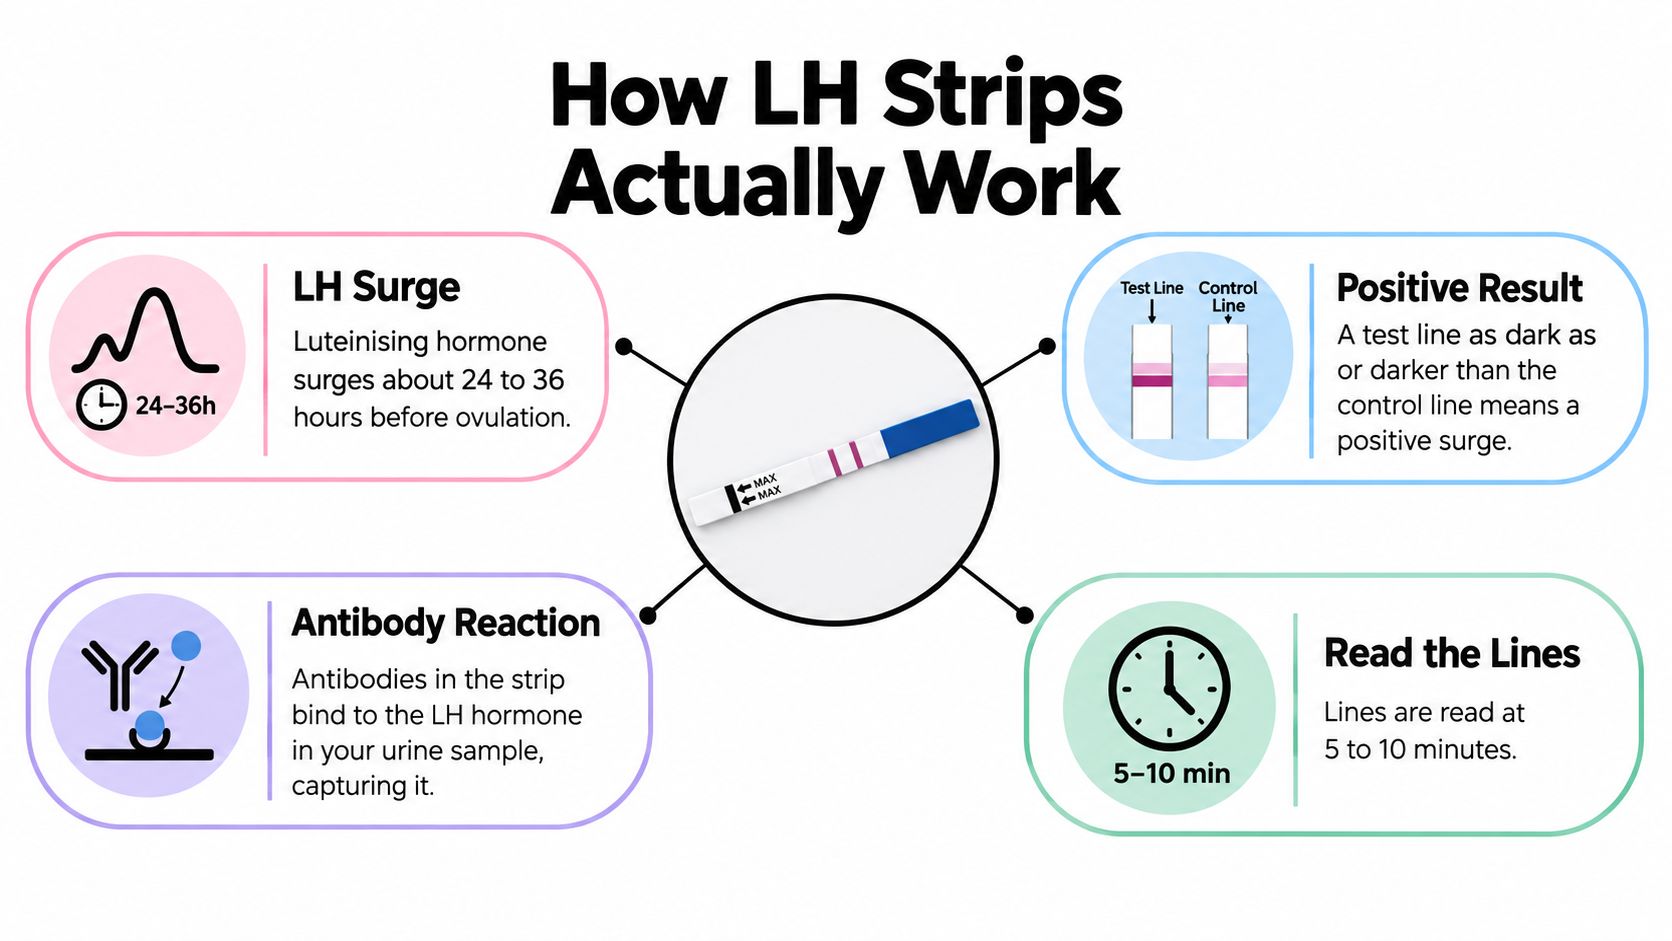
An LH strip detects luteinising hormone, or LH, in urine. LH is present at lower levels through much of the cycle, then typically rises before ovulation. Australian health guidance describes LH testing as one fertility-awareness method for identifying the fertile window, but it's useful for timing rather than diagnosing fertility.
That distinction keeps the result in perspective. A positive strip signals an LH rise, and the rise typically precedes ovulation, but the strip doesn't independently prove that ovulation happened.
The two lines have different jobs
The control line shows that urine moved through the strip and that the test ran. If it doesn't appear, the result is invalid, even if another mark is visible.
The test line responds to the amount of LH detected in the sample. On lower-LH days, it may be very faint or absent. As LH rises, the test line can become darker. A result is generally treated as a positive surge when the test line is as dark as or darker than the control line, provided you read it within the kit's stated time window.
A faint line isn't necessarily a faulty test. It can reflect the small amount of LH normally present in urine. Recording those baseline shades can make later changes easier to recognise. For background on how laboratory LH measurements are discussed, you can review this explanation of normal luteinising hormone ranges, remembering that a urine strip and a blood test answer different questions.
Plain strips make you compare colour yourself. Digital tests may display a symbol, while app-connected systems can help organise photographs and readings over time. The Venus Ovulation Predictor Test Kit is a strip-based option designed for home use and can be logged manually or into a preferred fertility app.
A plain strip has one quiet advantage: you can see the gradual movement from baseline to stronger test line across multiple days. A digital reader may feel clearer in the moment, but consistent manual logging can reveal the way your own cycle develops.
Getting the Timing and Sample Right
The test is simple when the routine is consistent. Use this sequence each day:
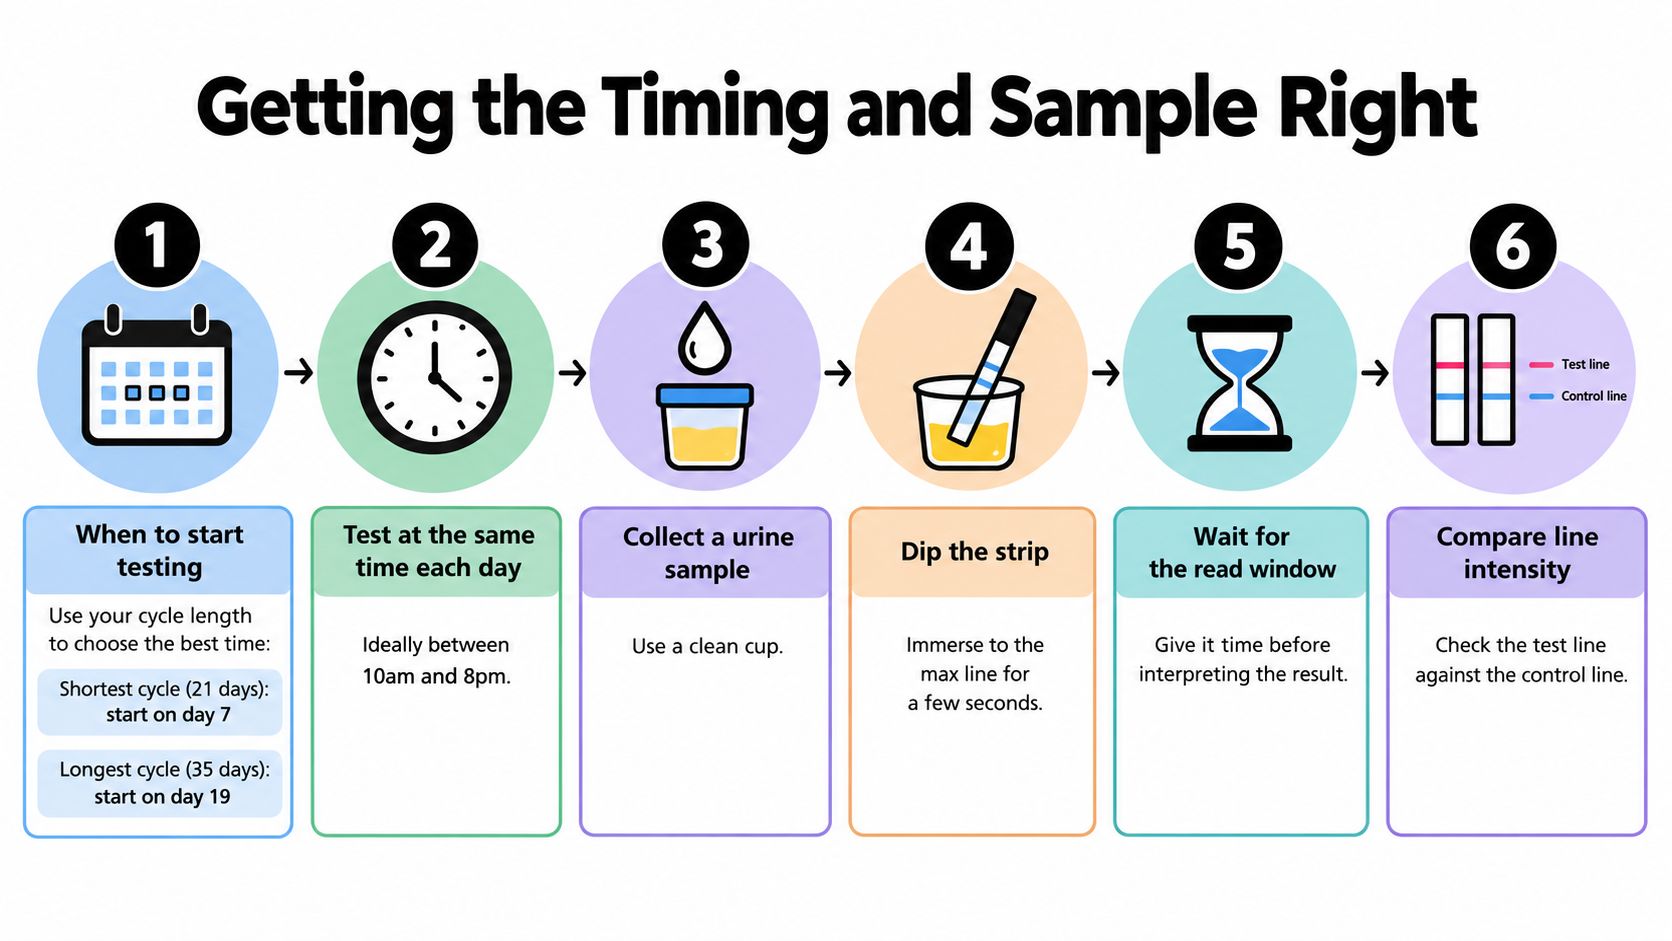
- Choose your starting day. Count the first day of proper menstrual flow as cycle day one. Begin early enough to cover your likely fertile window. If cycles vary, starting from the shortest recent cycle is a cautious way to avoid beginning too late.
- Use cycle length as a guide, not a promise. A short cycle can require earlier testing, while a longer cycle may shift the window later. For example, a 21-day cycle and a 35-day cycle will not use the same starting point. The Australian fertility testing review notes that urinary LH dipsticks are most useful when periods are regular, which is why cycle history matters.
- Pick a repeatable time. Australian instructions commonly suggest testing during the daytime rather than relying on first-morning urine. Many people choose a late-morning or afternoon slot, and some AU guidance places testing broadly between 10 am and 10 pm. Use the same general window each day so your results are easier to compare.
- Avoid over-diluting the sample. Large amounts of fluid before testing can make urine less concentrated and may weaken the LH signal. You don't need to make yourself uncomfortable, but avoid deliberately drinking a large glass immediately beforehand.
- Collect urine in a clean, dry cup. A cup lets you control the depth and duration of dipping. It also makes it easier to repeat the test correctly if you realise the strip was held too long.
- Dip only to the MAX line. Place the absorbent end into the sample for the time stated in your kit instructions, often about 5 seconds. Keep the printed MAX line above the urine.
- Lay the strip flat. Use a dry, level surface and start a timer. Many AU instructions describe results developing at about 5 minutes, with the valid reading window closing by 10 minutes.
- Read once, inside the window. Compare the test line with the control line, record the result, and discard the strip. Don't return to it later in the day.
The small details protect the result. Over-dipping can saturate the strip, while a wet bench can allow the sample to spread unpredictably. A late reading can show a drying or evaporation mark rather than the result that appeared during the valid window.
For a visual walkthrough of the physical process, watch the following demonstration after reading your own kit leaflet:
A positive strip is useful for identifying a likely fertile period, but it isn't a guarantee of ovulation. Australian consumer guidance also points to intercourse every 2–3 days as a reliable general approach when trying to conceive, rather than depending on one test alone. You can read more about interpreting the interval in how long after an LH surge you ovulate.
Reading Lines and Intensity With Confidence
Line reading becomes easier when you stop asking whether the test line is “visible” and ask whether it matches the control line. Visibility alone doesn't make a strip positive. The control line must appear, and the test line must be equal to or darker than the control for a positive surge interpretation.
Three common readings
A single control line usually means the test ran but the strip didn't detect an LH surge at that threshold. A faint second line can still be a negative result. It means some LH may be present, not that the surge has been detected.
An edging-positive result is useful as a tracking label. The test line is becoming noticeably stronger than on previous days but remains slightly lighter than the control. Treat it as a reason to keep testing carefully, and consider it a sign that your fertile window may be approaching, not a confirmed positive.
A true positive has a test line that matches or exceeds the control line in darkness. Record the time, because the time of the first positive can be more useful than a photograph viewed without context.
| What You See | What It Means | What To Do Next |
|---|---|---|
| Control line only | No LH surge detected in this sample | Continue testing at your chosen time |
| Faint test line, clearly lighter than control | LH may be present at a lower level, but the result is negative | Log the shade and test again |
| Test line getting darker but still lighter | Edging-positive pattern, not yet a confirmed surge | Keep testing consistently and consider closer monitoring |
| Test line as dark as or darker than control | Positive LH surge signal | Log the time and use it with your broader fertility plan |
| No control line | Invalid test | Discard it and repeat with a new strip |
| Mark appears after the valid window | Unreliable drying or evaporation mark | Ignore it rather than changing your interpretation |
Read the result at the stated time, often around 5 minutes, and no later than the kit's closing window, commonly 10 minutes. A strip can continue to darken as it dries, which is why a photograph taken much later can make a negative look falsely reassuring or falsely positive.
Practical rule: Photograph the strip while the result is valid, not after it has been sitting on the bench for the afternoon.
Colour perception also changes with lighting. Compare the lines under the same light where possible, and use yesterday's image only as a supporting reference. The control line is your anchor for that individual test, not the faintest or darkest strip you've ever seen.
Habits That Quietly Sabotage Your Results
Most disappointing results don't come from a mysterious failure. They come from small inconsistencies that make one strip impossible to compare with the next.
The quiet sources of confusion
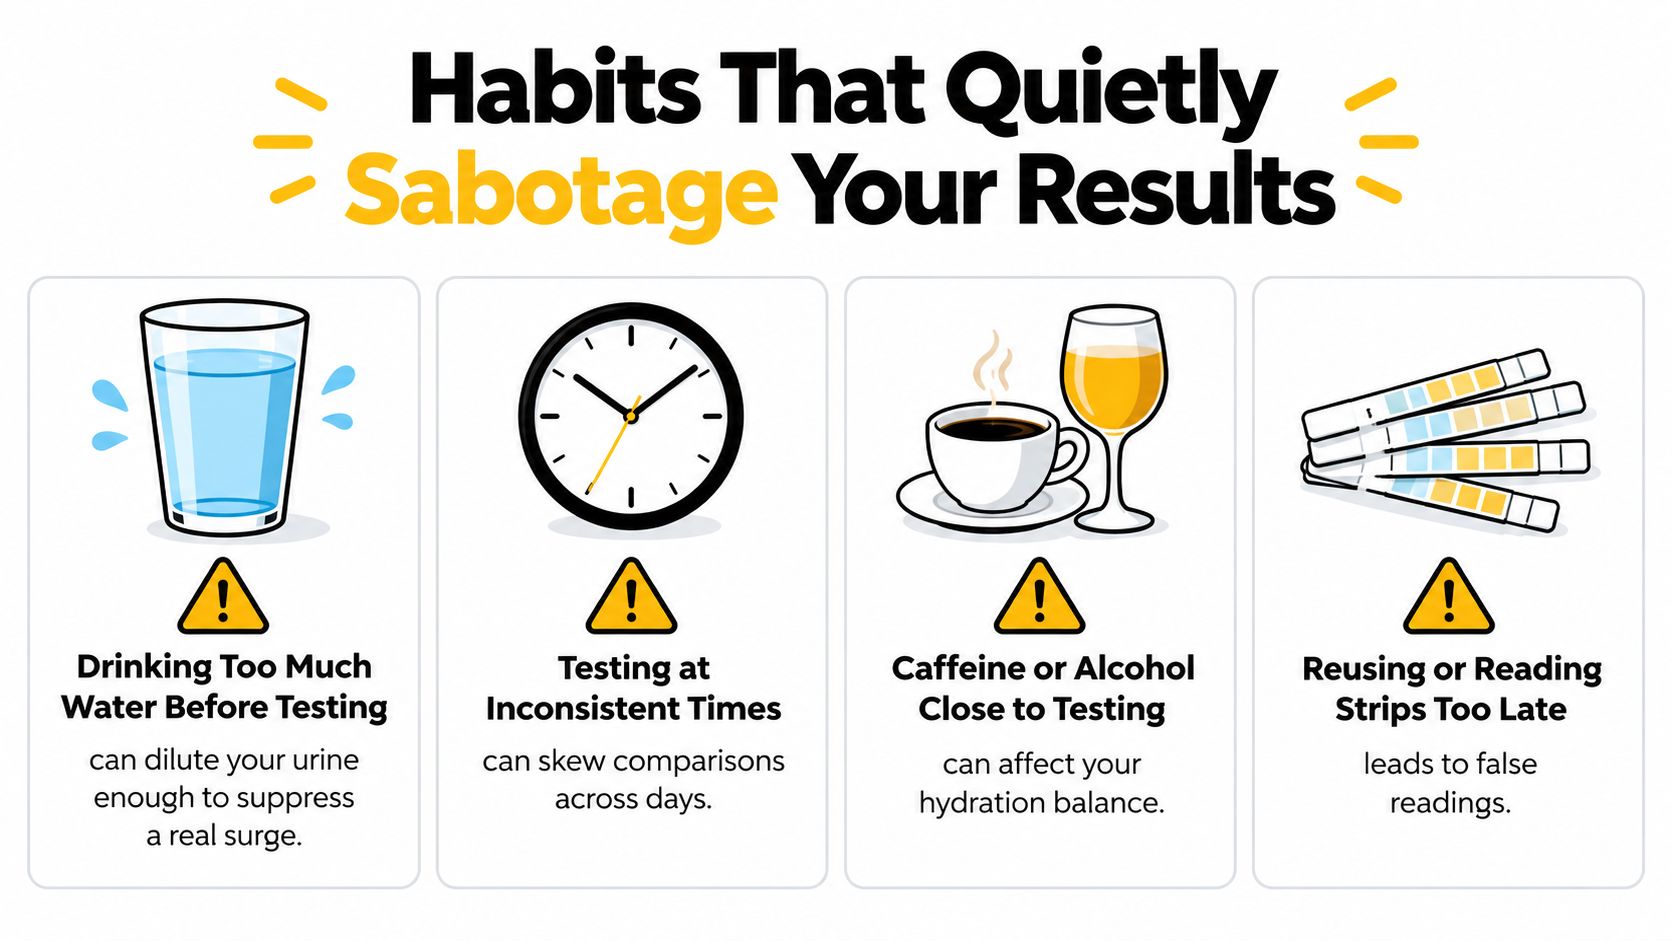
- Drinking a large amount before testing: Diluted urine can reduce the concentration of LH in the sample. Keep your fluid intake ordinary and avoid deliberately flooding yourself before the test.
- Changing the test time every day: A morning test and an evening test don't create a clean comparison. Choose a consistent daytime window.
- Dipping past the MAX line: Too much urine can oversaturate the strip. Use a cup and stop at the printed mark.
- Holding the strip in the sample too long: Follow the leaflet's dipping time instead of leaving the strip submerged while you search for a timer.
- Reading after the window closes: Drying marks can look like a second line. Set a timer, read once, and discard the strip after recording it.
- Reusing a cup or strip: A used strip can't provide a second valid result, and a damp or contaminated cup can alter the sample routine. Use a fresh strip and a clean, dry cup each time.
- Photographing under inconsistent light: App colour analysis can be misleading when one photo is warm indoor light and the next is bright daylight. Use a similar background and lighting.
- Leaving supplies in heat or humidity: Store unopened strips as directed by the manufacturer, and don't leave the pouch or strips beside steam, a heater, or a sunny window.
Digital readers reduce the need to compare line shades, but they don't remove the need for correct sampling. A photo-based app can help you track a progression, yet the phone camera may interpret colour differently from your eyes. The physical test instructions still come first.
When a result looks strange, check the routine before blaming your body or the product. Ask whether the sample was diluted, the timing shifted, the strip was over-dipped, or the result was read late. That short audit often explains the confusing strip.
Logging Results in an App for Cycle Clarity
A single strip gives you a moment. A series of well-labelled strips gives you a cycle pattern.
Start by photographing each strip in similar natural light against a plain, light background. Record the cycle day, the time of testing, and one simple label: negative, edging-positive, or positive. The label should reflect what you saw inside the valid reading window, not what the strip looked like after it dried.
Capture the surrounding context
Add notes that may explain why one day doesn't resemble another:
- Cycle observations: Flow, spotting, and cervical mucus.
- Body signals: Basal body temperature, sleep quality, and illness or unusual stress.
- Medication notes: Include prescribed fertility medication or other changes that may affect interpretation.
- Routine details: Approximate fluid intake and whether you tested at your usual time.
The ovulation tracker app can help keep these entries together rather than scattering photographs through your phone gallery. Set a reminder for the next test, especially if your likely surge tends to appear during a busy part of the day.
An app-connected workflow can also make a clinician conversation clearer. You can export or show a cycle summary containing the test dates, line progression, symptoms, and temperature observations. If you never record a positive, that may mean you started too late, stopped too soon, diluted the sample, missed a short rise, or had a cycle without ovulation. A missing result on its own isn't a diagnosis, but a repeated pattern is worth discussing with a GP or fertility specialist.
After several logged cycles, look for the shape rather than one “perfect” strip. You may see the test line stay faint, strengthen over a short run of days, reach its strongest reading, and then fade. You may also notice that your cervical mucus or temperature pattern adds context that the LH strip can't provide alone.
For people who also track broader body data, the Venus AI Smart Scale generates body-composition reports and health insights through its app. That information is separate from LH testing, so keep fertility interpretations tied to fertility-specific measures rather than assuming a general wellness reading confirms ovulation.
Quick Troubleshooting and Your Next Steps
A confusing strip doesn't mean the whole method has failed. First check the physical test, then the sample, then the timing. Most problems have a practical next step.
| Problem | Likely Cause | Quick Fix |
|---|---|---|
| No control line appears | The strip was invalid, damaged, or used incorrectly | Use a new strip and follow the MAX-line and dipping instructions |
| Test line stays faint | Testing may be early, late, inconsistent, or affected by diluted urine | Start earlier next cycle, test consistently, and reduce excessive fluids before testing |
| A positive seems to vanish overnight | The LH rise may have passed, or the earlier result was read outside the valid window | Log the original timed result and don't interpret dried strips |
| Two positives appear in a row | The LH signal may remain detectable across more than one test | Record both times and look at the first clear positive in the cycle pattern |
| No positive appears during the cycle | The fertile window may have shifted, or the surge may have been missed | Continue testing longer next cycle and consider twice-daily testing near the expected window |
| The line looks different in app photos | Lighting, camera processing, or angle changed | Photograph against the same background and use the control line as the reference |
Save this checklist
- Cycle day: Count day one from the first day of proper flow.
- Start date: Begin early enough for your shortest likely cycle.
- Testing window: Use a consistent daytime time.
- Sample: Collect in a clean, dry cup and avoid excessive fluid beforehand.
- Dip: Stop at the MAX line and follow the kit's timing.
- Read: Use only the valid window, then record the result.
- Log: Add the time, cycle day, symptoms, and photograph.
- Follow-up: Speak with a GP or fertility specialist if confusing results repeat or you have concerns about your cycle.
If your cycles are irregular, you may need to start sooner, test for longer, or increase testing frequency near the expected fertile window. A digital reader can also be useful if comparing line intensity causes ongoing stress, while an app can preserve the pattern for discussion with a healthcare professional.
If you want a straightforward way to begin, Venus Health Co. offers at-home LH test strips that can be used with manual logging or a preferred fertility app. Visit Venus Health Co. to explore its fertility tracking tools and choose the workflow that fits how you already monitor your cycle.